Have you ever gone to a cookout, having saved all your calories for a great grilled hamburger only to be grossly disappointed? That was me this past weekend (we had unseasonably warm weather!). The burgers were barely edible and had I known going in, I would have opted for the grilled chicken which was also on the menu. Sigh. Let me tell you what went wrong so you too, don’t kill your burgers.
First up, the meat. The gal who hosted the party is very fat-conscious. I appreciate that, so am I. But when it comes time to slap your patties together, you need a little fat to make ‘em good. This is not what happened. Extra-lean beef went into these dried burgers. It was also ground too fine, making it mushy. Ugh. Gotta have a little fat and make the meat coarsely ground.
Secondly, the fire. It was too cold. The grill has to be hot (and clean, did I mention clean? Black schmutz all over your burger is nasty! I don’t want to eat what you had the weekend before!). Make it hot, hot, hot. Clean the grill, get it hot, and then let your burger sit till it’s ready to be flipped. If you flip it too soon, it will fall apart.
Third, defend against the urge to pat the patty! When you overly babysit the burgers, flattening it out with the spatula every 2 minutes, you are throwing the juiciness away and making a perfectly good burger into a hockey puck. Resist the spatula—they are for turning only, not patting!
Fourth, turn down the heat. Once you’ve flipped it once, turn down the heat, the grill will mark the other side nicely and now it’s time to get the middle cooked. Having your grill at about a medium heat will do that beautifully. When your burger feels a little bouncy in the middle, it’s cooked medium and is ready to be pulled. Remember, it will continue to cook for just a minute, so it will be just right once you dig in.
Fifth, let ‘em rest. Just 5 minutes is all you need. Then the juices settle, the pinkness goes away (unless you want the pink, which you really shouldn’t do for health reasons) and your burger is right for the eating.
Sixth, let’s eat. Toasted buns are best, stack the lettuce, tomato, and onion. Let the mayo, ketchup, and relish have their way and dig in! Incidentally, my friend asked me for help with her burgers and this is exactly what I told her too, so don’t think I’m ratting her out! Anyway, here’s a recipe for a great side dish:

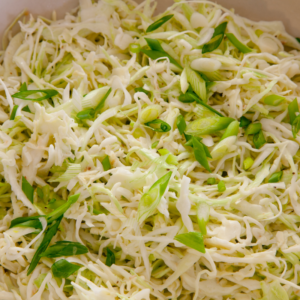
Asian Coleslaw
Ingredients
- 16 ounces shredded cabbage
- 3 green onions chopped
- 3 teaspoons freshly grated ginger
- 2 cloves garlic pressed
- 1 tablespoon low sodium soy sauce
- 1 tablespoon sesame oil
- 2 tablespoons rice wine vinegar
- 1 tablespoon lime juice
- 1/4 cup lowfat mayo
Instructions
- Place cabbage and green onion in a large bowl.
- In another bowl, whisk together remaining ingredients and pour over over cabbage mixture.
- Toss, cover and refrigerate, allowing flavors to meld for at least an hour.
PS–You can receive delicious menus (complete with shopping lists!) like this delivered right to your email inbox by subscribing to Dinner Answers today!